

It’s been a while since I have posted any skincare related stuff, so let’s talk layering. My nightly skincare routine takes about 2o minutes, but that’s only because I have about 10 steps to it. Each step is catered to my skin type and current skin problems. Also, I make sure to complete these steps in the order that would give me the maximum benefit of the products used. I’ve done some research (which is basically just google, nothing fancy) and consulted with my dermatologist on the proper way to layer skincare because I use, like, a million skincare products a day.
I also have a morning skincare routine, but that only ranges around 10 minutes because I cut down on a lot of products for the reason that I enjoy that lighter feeling of having less product being caked on my face when I’m out and about. Also, I’m always late leaving the house for school/work. I got no time for a 20 minute routine, gurl.
Products absorb and soak into the skin much better when I’m sleeping without have external variants (pollution, germs, face-touching, etc.) interfere with the products doing their thang. My skin uses the time that I sleep to regenerate and the gazillion number of skincare products that I have applied will aid my skin cell’s regeneration process. They don’t call it beauty sleep for no reason.
Before, I share my own nightly skincare routine, here are a few general rules to adhere to for any individual’s nightly routine.
-Always cleanse first! Don’t come crying to me when you get a pimple from build-up the next morning.
-Always use toner after cleansing to get the last bit of dirt off and to prep your skin for better absorbency of the many skincare products to come after.
-The more liquid-based items are always applied first, working up to the more solid-based items. The exception here are problem target items, like acne cream. I would apply these first, so that it can release its full impact onto your skin and target that problem more directly.
-Always be gentle when working with your skin. When cleansing use gentle and circular motions with the pads of your finger tips. When applying products, instead of slathering or rubbing it on, pat it on gently until fully absorbed. The idea here is to use gentlewomen hands and to treat your skin like you would your newborn baby.
Now, let’s reveal my routine and the products that I use- Tada!
Cleanse

Step 1: Remove the day’s grime with a make-up or baby wipe. I like using baby wipes because they are less harsh on the skin and my skin is sensitive as hell. I mean, if it’s safe for a baby, it probably won’t do much harm on me. Because of my skin’s sensitivity, I tend to use products that consist of natural, pure, or organic ingredients and to go for the more cooling or light flavors (cucumber, mint, aloe, green tea, etc).
I am currently using Amazon Elements Baby Wipes in the fresh scent. They come out to be around $0.02 per wipe, which is crazy cheap compared to the overpriced makeup remover wipes from Sephora.

Step 2: I like to exfoliate 2-3 times a weeks to get of dead skin cells because the buildup of dead skin cells and dirt is the reason for pimples to stop on your face. Exfoliating also helps with giving a brighter, more even skin tone because it encourages the new skin cells to surface. This step should not be daily because that would be too harsh on the skin. Exfoliate alternate days or even every other two days.
I am currently using St. Ives Exfoliating Anti-blemish & Redness Cleanser. It has exfoliating beads in the cleanser that helps with removing the dead skin cells and dirt from your face. However, i have heard that these very beads are not so nice for the environment, so I’ll be switching to something else- I gotta protect the planet you know.

Step 3: For the next step of cleaning, I use a very gentle cream- or foam-based cleanser than I rub into my face with gentle, circular motions.
I am currently using Nubian African Black Soap infused with organic oats, aloe, and vitamin E. It looks like shit, but it lathers wonderfully and smells like coconuts. Plus, facial bar soap is a thing now and I am always quick to jump on board with whatever claims to be working.
Prep
 Step 3: I pat on toner and, depending on the type used, you may have to wipe off with a cotton pad. Ofc, I like using the one you pat on and absorb fully because ain’t no one got time for getting a cute little cotton pad to wipe down the excess toner.
The toner I am currently using is Innisfree’s Green Tea Balancing Skin. ‘Skin’ is the same thing as toner by the way. I just pat this on until I feel it become fully absorbed. I like that this toner does not leave a sticky feeling to the skin. I don’t know about other people, but I just can’t work with sticky skin.
Moisturize

Step 4: Face mist time! Has anyone ever watched Secret Garden and wondered what the evil mother-in-law was spritzing on her face? And then Big Bang’s Seungri had me dying with laughter when he sprayed it on everything within spray distance, going “Ssmell~ ssmell~~”. This is the time for you to do the same thing, just spray on to your face with a dramatic flair and gently pat in to skin for absorbed.
I am currently using Innisfree’s Olive Real Oil Mist. I’ve used better sprays, but I gotta finish this before it goes to waste. I was expecting a light olive scent to this mist, but it smells like lemon?

Step 5: Because the skin around the eyes are thinner and requires different skincare needs than the rest of the face, it is recommended to use a product made specifically for your eye area. It can be moisturizing, anti-wrinkle, brightening, etc.- all depending the problem you would like to target.
I am currently using Nature Republic’s The First Time Rice Eye Cream. Nothing spectacular to brag about for this eye cream. I bought this on whim when I was lured into a Nature Republic store by the life-size cardboard cutout of Luhan and it felt awkward leaving without making a purchase. That’s how they getchu, man, with cardboard cutouts of cute guys.

Step 6: Now is a good time to put on those products target the problem areas on your face. For example, your pimple cream (which is me, always), anti-wrinkle cream, scar diminishing cream, etc.
I typically use whatever is currently prescribed by my dermatological for skin problems, which is mainly acne and acne scars- so fun -_- always. I’m currently applying a thin layer of Clindamycin Phosphate Gel 1% on my pimples and Metronidazole Gel 0.75% on my acne scars. Yasss, this just made me sound really smart. Ok, next!

Step 7: Serum is fully concentrated with that good stuff for you skin and this is the time to apply so that it will let your skin enjoy it’s potential to the max!
I am currently using a oil-based serum, Hush+Dotti’s Dream Drops Hydrating Serum. This is apparently a fan favorite for celebrities and professional makeup artists. It consists of organic AND vegan oils and vitamins, so I’m just like, shut up and take my damn money. I use about 5-6 drops and emulsify with the heat from rubbing between the palms of my hands before patting onto my face.
I use a facial sheet mask 2 to 3 times a week and because a sheet mask is essentially drenched in serum, I drop the serum step on my mask days. I hoard sheet masks like no one’s business, so I have a lot to choose from, it really depends on how my skin is feeling on mask day. A little fun fact about me is that I always mask on the plane during travels (and receive strange looks from the passengers) and I will collect face masks from whatever country I am visiting.
Step 8: Lotion or emulsion is emulsified (tongue-twister) between my palms and patted on to skin till fully absorbed. ‘Emulsion’ is essentially a light lotion, so they are the same thing to me.
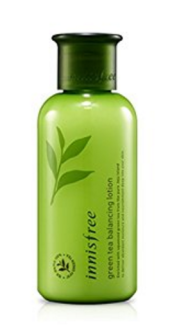
I am currently using Innisfree’s Green Tea Balancing Lotion. This came as a set with the skin that I mentioned above and I figured, why not? I like buying skincare sets because one purchase helps me decide on multiple skincare steps and usually the items that are in a set are meant to compliment each other. The only downside with using a set is the lack of customization- they normally target one skin problem (like say hydration) when it’s very likely that I would like to target multiple skin problems during my skincare routine (hydration, acne, etc.).

Step 9: A cream is emulsified and patted on till fully absorbed. Because the lotion used in the previous step is so light, it’s just not enough moisture and hydration for my skin (especially in the winter). This cream would help bolster the needs of my skin on cold and dry days.
I am currently use Innisfree’s Green Tea Balancing Cream. Surprisingly, my skin absorbs this quite well for a cream on the heavier side, like it’s not just sitting on my face.

Step 10: Go to bed, gurrrl. Jk, you wish. Going to bed does not count as a skincare step. Lastly, I apply a sleeping mask to seal in everything I have just applied on to my face and make sure that they will all be absorbed over the course of the night. I opt for sleeping masks with a light gel consistency that provides a cooling or calming effect.
I’m currently using Dr. Lin’s Daily Hydrating Gel with hyaluronic acid and aloe vera. I’m pretty sure it’s meant to be used in the daytime, but, whatever- it works better as a sleep-in mask for me. This gel has amazing reviews and I am not disappointed- once it’s absorbed, my skin is left with a dewy and non-sticky finished.
Even though sleep is not a skincare step, it does play a very important role in healthy skin. The best time to have your nightly shut eye is from 10 PM to 2 AM because that it the time when your skin cells are working the hardest in regenerating. Sleeping during this time frame helps your skin do its thing. I can guarantee that if you hit the bed at 10 PM for a week you will notice a difference in your skin.
Disclaimer: I am not sponsored by any of the products mentioned above and I am in no way a skin expert, but no one can be a better skin expert than yourself. You know your skin the best- you know what makes your skin irritated, you know what products work on your skin and what doesn’t. I may not know the difference between ampoules, essences, boosters, and whatever the heck that is out there, but I do know, from my journey of trying out a gazillion products and constantly meeting up with my dermatologist, that there is no one solution for perfect skin. Each and every single person’s skin is different, even your own skin changes over time (changes for the better, I pray). The only way to get our closest version of ‘perfect’ skin is to always improve our skincare routine and making sure that the products that we use is right for our skin and that it is what our skin needs.
